
Objective: Use shape, repetition, and color to create
an abstract art piece representing reflection and identity
Materials Needed: Cardstock (or heavy, smooth paper), Washable Markers, Scissors, various sized circular objects/lids to trace
Art Vocabulary
ABSTRACT ART: A style of art that does not look realistic. It is often characterized by the use of geometric line and shapes, bold and bright colors
REPETITION: One object or shape that is repeated, meaning to be exactly the same over and over
RADIATE: To spread out from a center point, like sun rays
WARM COLORS: A grouping of colors that includes reds, yellows, and oranges
COOL COLORS: A grouping of colors that includes greens, blues, and violets
CONCENTRIC CIRCLES: Circles with a common center, like a target
Project Instructions: Identity Circles

1. Find your paper with two 5.5” circles on it. If you don’t have the accompanying supply kit, draw two 5.5” circles on your paper. You can find something to trace for your circle, or freehand it.
2. Choose two markers. Think about what those colors represent to you. Are they warm or cool colors?
3. Lightly trace/freehand 2 to 3 smaller concentric circles inside your two 5.5” circle to use as guidelines.
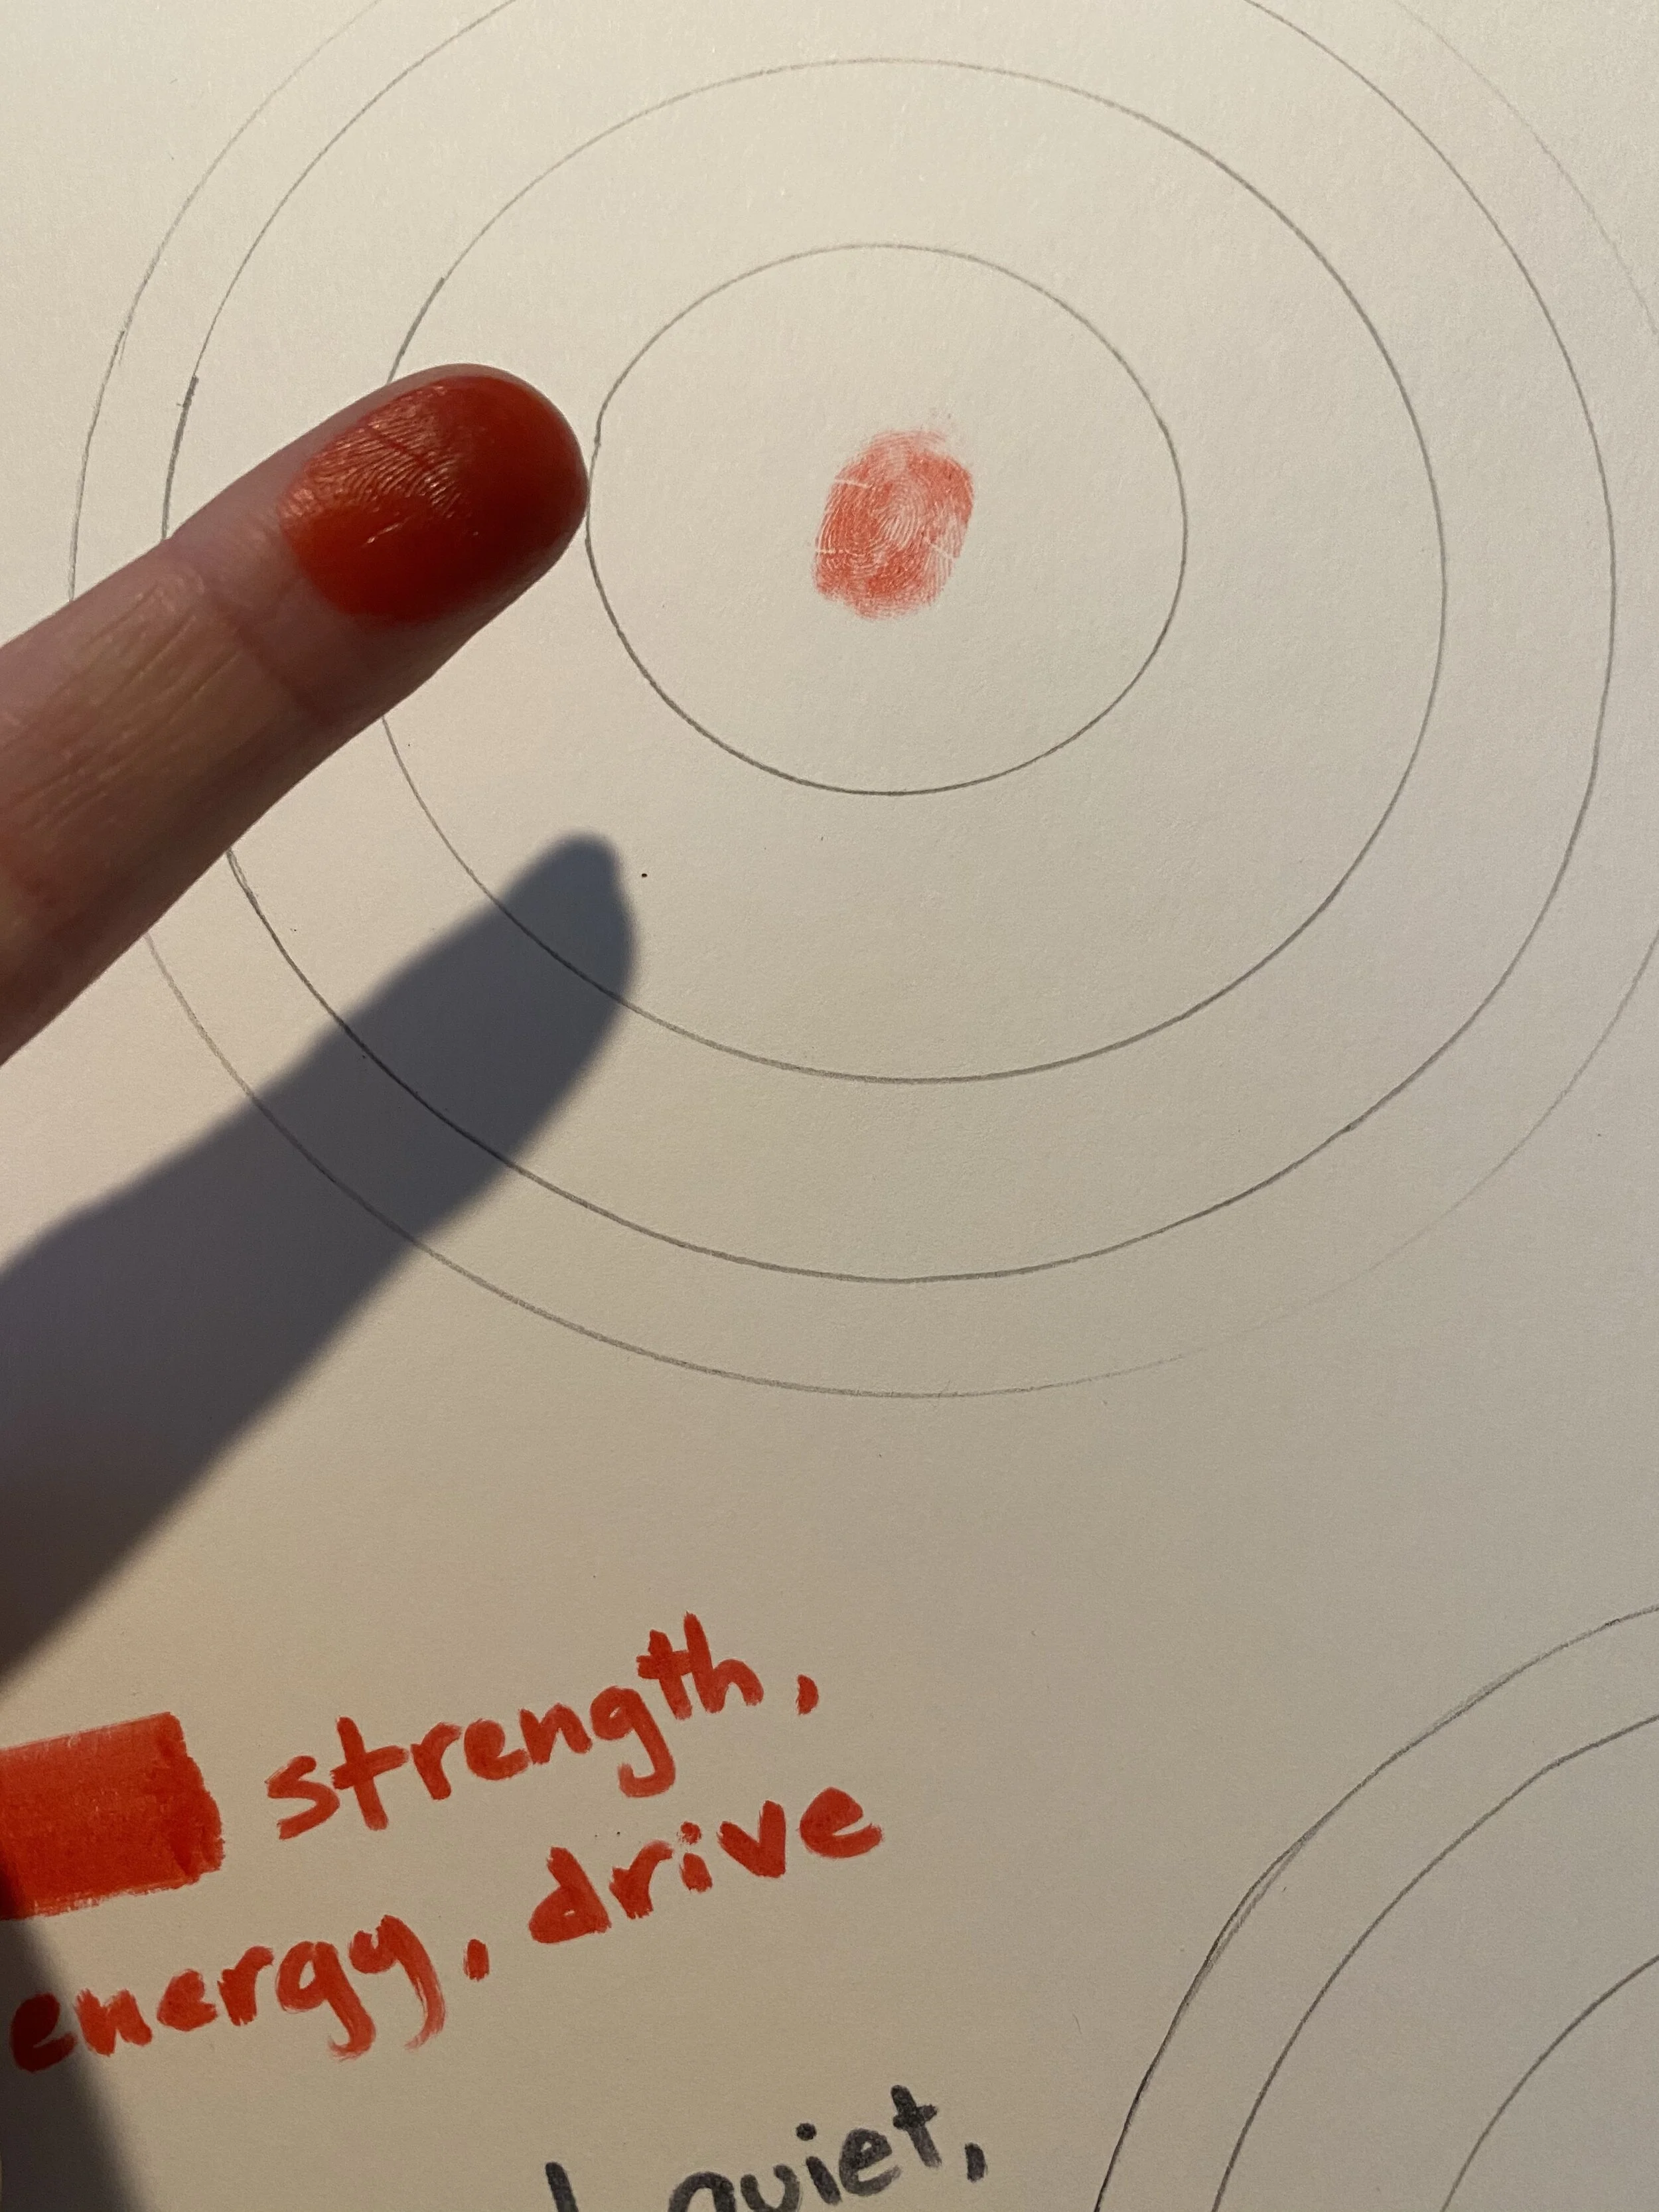
4. Let’s start with fingerprints. Use the marker to color the tip of your index finger. Quickly stamp it in the middle of your circle (the bullseye of your target).
5. Now, switch to your second color marker. Color the tip of a different finger, and stamp that finger repeatedly to create a ring around the middle fingerprint. You will need to reapply the marker after every third or so print. Don’t worry, it will wash off at the end!

6. Continue to create fingerprint rings in concentric circles, alternating between your two colors, starting in the middle and radiating out until you reach the outside edge. Enjoy the meditative process of repetition, repeating the same task, over and over, to create your abstract art.
7. Let’s move to the second circle. We will use a similar process, this time with the text from your journal prompts. Start with your first color. Copy your text into the circle, following the curve. Each ring should contain a separate thought. Alternate colors as you work through the concentric circles. Notice that the outside rings can hold more text than the tiny space in the center of your circle. How does it feel to write in a circle, moving the paper slowly as you go? Continue until the text circle is complete.

8. (If you did not receive pre-cut circles) cut your two circles out. Use a pencil to write Words Alive, your name (first name and last initial), school, and contact (email or a phone number) on the back. Press lightly so your words don’t show through the paper.
9. Place your completed circles in the stamped envelope and drop in a mailbox. If you don’t have a provided envelope, please mail to ArtReach at 2210 Columbia Street, San Diego, CA 92101. Students who submit their final work will be entered to win a raffle item (educational toys, art supply bundles, etc).
10. Just as your fingerprint was only one dot in your larger artwork, your completed circle will be one dot in a *giant* circle. Join us for a virtual culminating event to see how your individual Identity Circle is collaboratively installed to create this Community Circle temporary mural! Event details to come.
11. Bonus - Do it again! Teach your family the technique you learned!